
Why Plugin Installation Is Just the Beginning
In the world of e-commerce, standing still means falling behind. If you're not continuously expanding your Shopware store with new functionality, you risk losing ground to competitors. The process of installing a Shopware plugin is often misunderstood as a purely technical task—a necessary chore to "get done quickly." But this perspective falls short of the reality.
Installing an extension is the moment when you unlock new potential for your store. Whether it's a complex AI-powered product consultation tool, a marketplace integration, or performance optimization—the way you install and configure the plugin determines whether it boosts your revenue or slows down your shop. For more insights on which extensions provide the most value, check out our guide on best Shopware plugins.
In this comprehensive guide, we focus on Shopware 6, as Shopware 5 has reached end-of-life according to Qualimero. We go beyond standard documentation to show you not only how to click, but also how to avoid common pitfalls, ensure performance, and correctly integrate complex tools (like AI agents) into your system landscape. If you're just getting started, our Shopware installation guide covers the foundation you'll need.
Preparation: The Safety Checklist (Pre-Flight)
Before you even think about clicking "Install," you need to ensure your system is ready. A rushed upload can, in the worst case, crash your checkout entirely—the dreaded "White Screen of Death."
Checking System Requirements (2025 Standards)
With updates to Shopware 6.6 and newer, requirements have become stricter. Outdated server environments pose a massive security risk and are a common cause of installation failures. According to APMac, maintaining current PHP versions is critical for plugin compatibility.
- PHP Version: Ensure your server runs at least PHP 8.2. Older versions are no longer supported.
- Database: MySQL 8.0+ or MariaDB 10.11+ are mandatory according to Shopware documentation.
- Memory Limit: For installation and theme compilation, the PHP `memory_limit` should be set to at least 512 MB (preferably 1024 MB) to avoid "Allowed memory size exhausted" errors as noted by Great2Gether.
The Pre-Flight Checklist
Copy this list and review it before every installation. For optimal store performance after installation, refer to our Shopware performance optimization guide:
Secure both database AND filesystem before any plugin installation
Ensure plugin version matches your exact Shopware version (e.g., 6.6.x)
Check for breaking changes in plugin updates
Never install new, complex plugins directly in production—use staging first
Method 1: Store Installation (The Standard Way)
This is the simplest way to install a Shopware plugin. It's perfect for standard extensions purchased or rented directly from the official Shopware Community Store. For understanding the financial aspects of various plugins, see our breakdown of Shopware plugin costs.
Step-by-Step Store Installation Guide
1. Link Your Shopware Account: Navigate in the Admin area to Settings > System > Shopware Account. Ensure your shop is linked to the correct Shopware ID. Without this connection, licenses cannot be validated. According to Firebearstudio, this step is critical for accessing your purchased extensions.
2. Access Extensions: Go to Extensions > My Extensions. Here you'll see a list of all licenses assigned to your account.
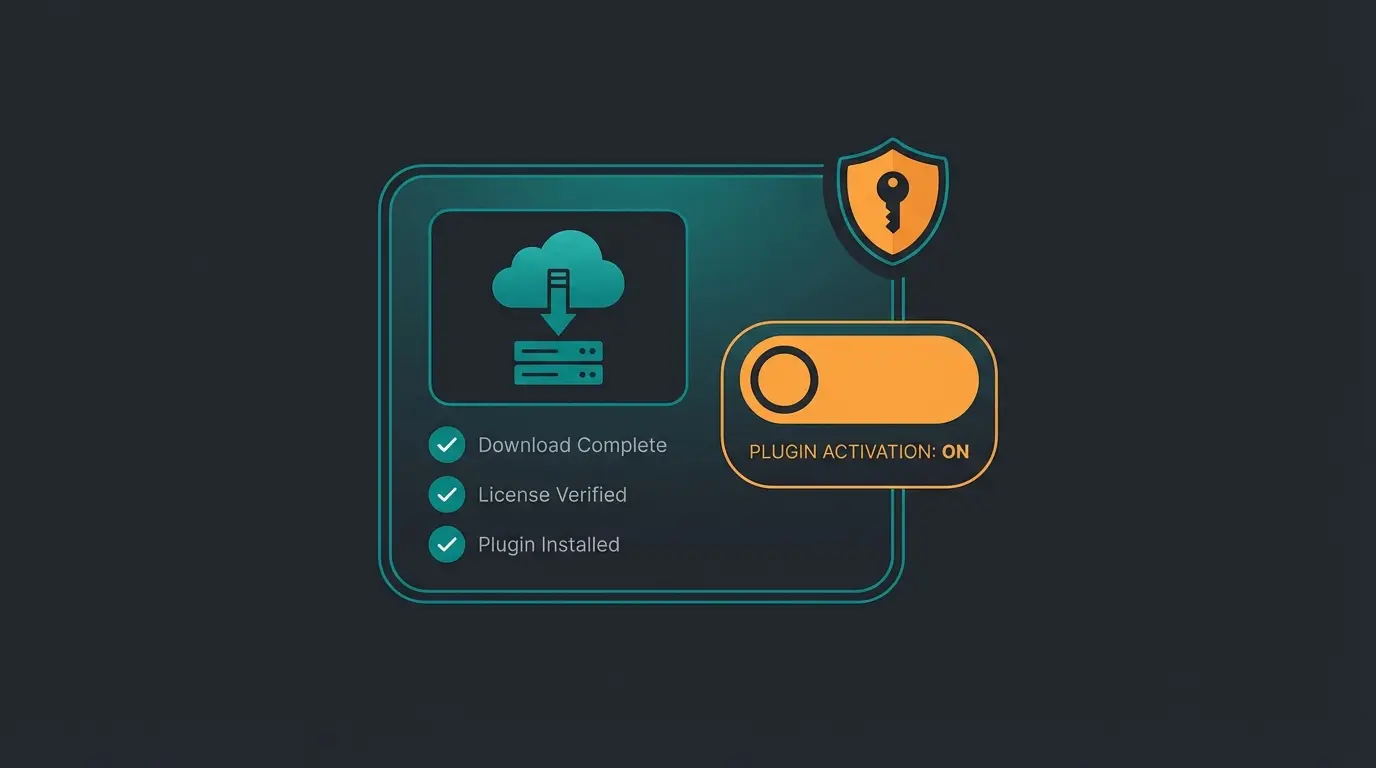
3. Download & Installation: Find the desired plugin. If it hasn't been downloaded yet, click the cloud icon ("Download"). After downloading, the status changes. Now click "Install App" as documented by Bay20.
4. Activation: After installation, the plugin is physically present but still inactive. Toggle the switch in the list to activate it.
Method 2: Manual Installation (The Upload Way)
This method is essential when you're using custom plugins developed specifically for your agency, or when you're using extensions from third-party providers (e.g., Envato, GitHub) that aren't listed in the official Store. Explore our list of Shopware must have plugins to discover which extensions are worth the manual installation effort.
The Scenario: Installing a Custom AI Plugin
Imagine you've received a special "AI Product Consultant" plugin as a ZIP file. This type of intelligent extension can transform your customer experience, but proper installation is crucial.
Step-by-Step Manual Installation Guide
1. Prepare the ZIP File: A common mistake is the wrong folder structure. The ZIP file must directly contain the plugin folder (e.g., `SwagAIPlugin`), not a subfolder first. If you get the error `No extension found in ZIP file`, unpack the archive and check the structure according to Shopware's troubleshooting guide.
2. Upload in Admin: Go to Extensions > My Extensions. Click "Upload Extension" in the top right corner. Select your ZIP file.
3. Installation & Activation: The plugin now appears in the list. Click "Install" and then toggle the activation switch.
The Legacy Structure Error Warning
With older plugins or incorrect packing methods, errors can occur. Shopware 6 expects a `composer.json` file in the root directory of the plugin. If this is missing or faulty (e.g., invalid JSON), the upload will fail. As noted on GitHub, this is one of the most common issues developers encounter.
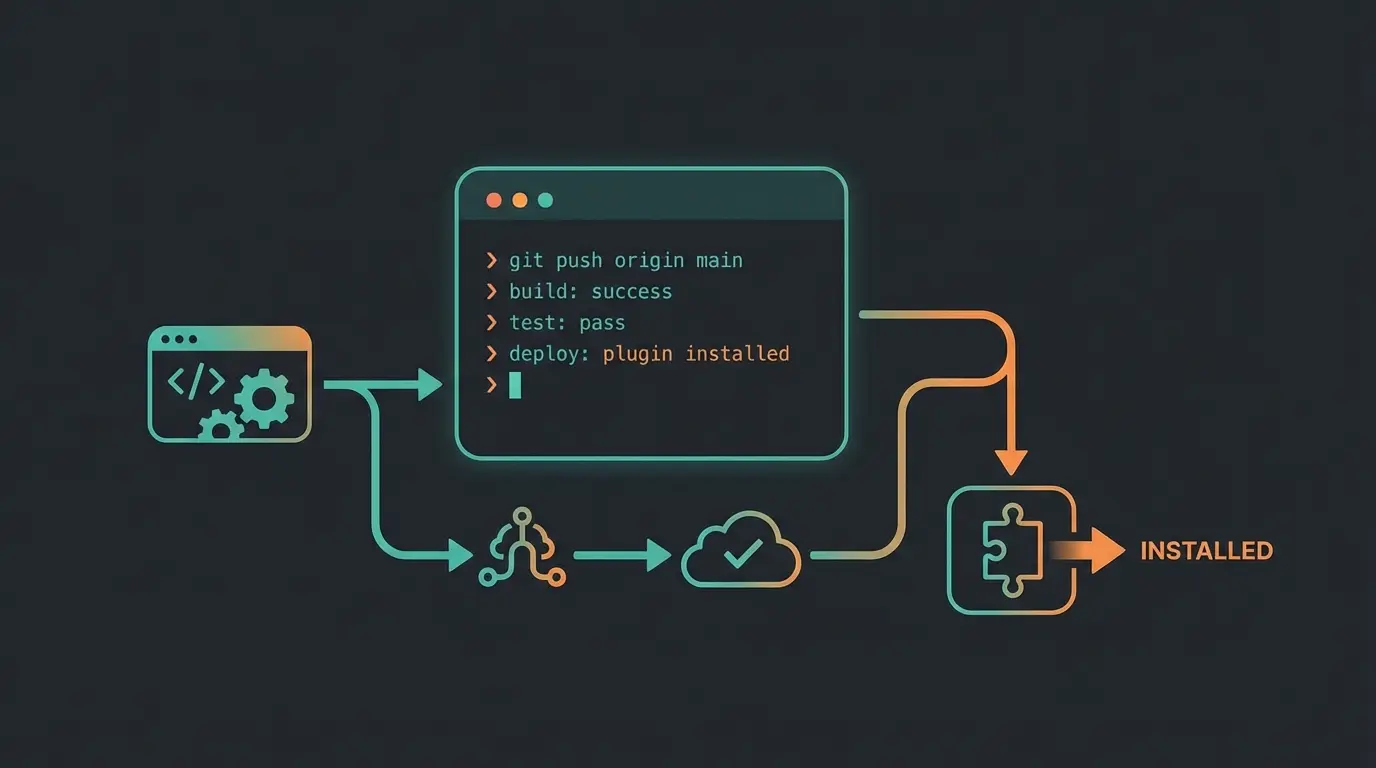
Method 3: CLI/Composer Installation (For Professionals)
For developers and larger shops, the command line interface (CLI) is the only true way. Why? Because it's scriptable (CI/CD pipelines) and avoids web browser timeouts. Understanding the Shopware Store API can help you leverage these developer-focused tools more effectively.
Why Use Composer?
Composer is the package manager for PHP. It automatically resolves dependencies. If your AI plugin requires a specific machine learning library, Composer downloads it automatically. As explained by Kiwee, this approach ensures all requirements are met without manual intervention.
Essential CLI Commands
Open your terminal and navigate to the root directory of your Shopware installation.
1. Refresh Plugin List: So Shopware recognizes newly uploaded files (e.g., via FTP in `custom/plugins`):
```bash php bin/console plugin:refresh ```
This command scans the filesystem for new `composer.json` files as documented by Fol9000.
2. Install and Activate Plugin: Use the technical name of the plugin (not the display name):
```bash php bin/console plugin:install --activate SwagAIProductConsultant ```
The `--activate` flag saves a step by performing installation and activation in one go.
3. Clear Cache (Mandatory): After every CLI installation, clear the cache to ensure templates and configs are reloaded:
```bash php bin/console cache:clear ```
Automation in CI/CD Pipelines
In modern deployments (e.g., via GitLab CI or GitHub Actions), plugins aren't installed manually. Instead, commands like `composer install` load all dependencies, followed by scripts that execute `plugin:install`. This guarantees that the live shop exactly mirrors the development environment. According to Shopware's deployment documentation, this is the recommended approach for enterprise implementations.
Installation Method Comparison
Choosing the right installation method depends on your technical expertise and use case. This comparison helps you decide which approach fits your needs:
| Method | Difficulty | Best For | Automation Ready |
|---|---|---|---|
| Store Installation | Low | Standard users, licensed plugins | No |
| Manual Upload (ZIP) | Medium | Custom plugins, external tools | No |
| CLI/Composer | High | Developers, enterprise deployments | Yes |
Critical Step: Activation and Configuration
Most guides end here. But when you install a Shopware plugin, the work is only half done. Especially with complex tools like AI solutions, the real integration begins now. This is your key differentiator from competitors who stop at "click Activate."
API Configuration and Data Synchronization
A plugin that's "installed" is often just an empty shell. For advanced integrations like Shopware ERP integration, configuration is where the magic happens.
- Enter API Keys: In the Plugin Manager, click the three dots next to the plugin and select "Configuration". Enter API keys here (e.g., OpenAI Key, interface tokens). Best practice is not to hardcode these sensitive data in the code, but to inject them via plugin config according to 2HatsLogic.
- Data Mapping: With AI tools, you often need to define which product fields (description, properties) should be analyzed.
Theme Compilation
If the plugin modifies the frontend (e.g., adds a chatbot button), the theme must be recompiled. Shopware often does this automatically, but via CLI it's safer:
```bash php bin/console theme:compile ```
Without this step, customers often see only a broken layout according to MeetJoshi.
Now that you understand plugin installation, take the next step with AI-powered product consultation. Our solution integrates seamlessly with Shopware 6 using modern app technology.
Start Free TrialApps vs Plugins: Understanding the Difference
Shopware 6 distinguishes between Plugins (classic) and Apps (new). Many users use the terms interchangeably, which is incorrect. This distinction is crucial for the Shopware Community guide understanding of the ecosystem.
| Feature | Shopware Plugin | Shopware App |
|---|---|---|
| Architecture | Integrates deeply into core (PHP code on your server) | Runs externally (often cloud/SaaS), communicates via API |
| Performance | Can slow down shop if poorly programmed | Low load on your server as processing is offloaded |
| Maintenance | Must be checked for compatibility with every Shopware update | Often lower maintenance as updates are centrally deployed by provider |
| Use Case | Deep system modifications (e.g., checkout logic) | External services (e.g., newsletters, AI tools, marketplaces) |
According to Webiprog, understanding this distinction is crucial for making informed decisions about your tech stack.
The Plugin Lifecycle Infographic
Understanding the complete plugin lifecycle helps ensure successful installation and long-term functionality:
Check compatibility with your Shopware version and read reviews
Create database and filesystem backup—safety first
Upload via Store, ZIP, or CLI based on your method
Toggle the plugin switch to enable functionality
Run theme compilation if frontend changes are involved
Enter API keys, map data fields, and customize settings—this is where value is created
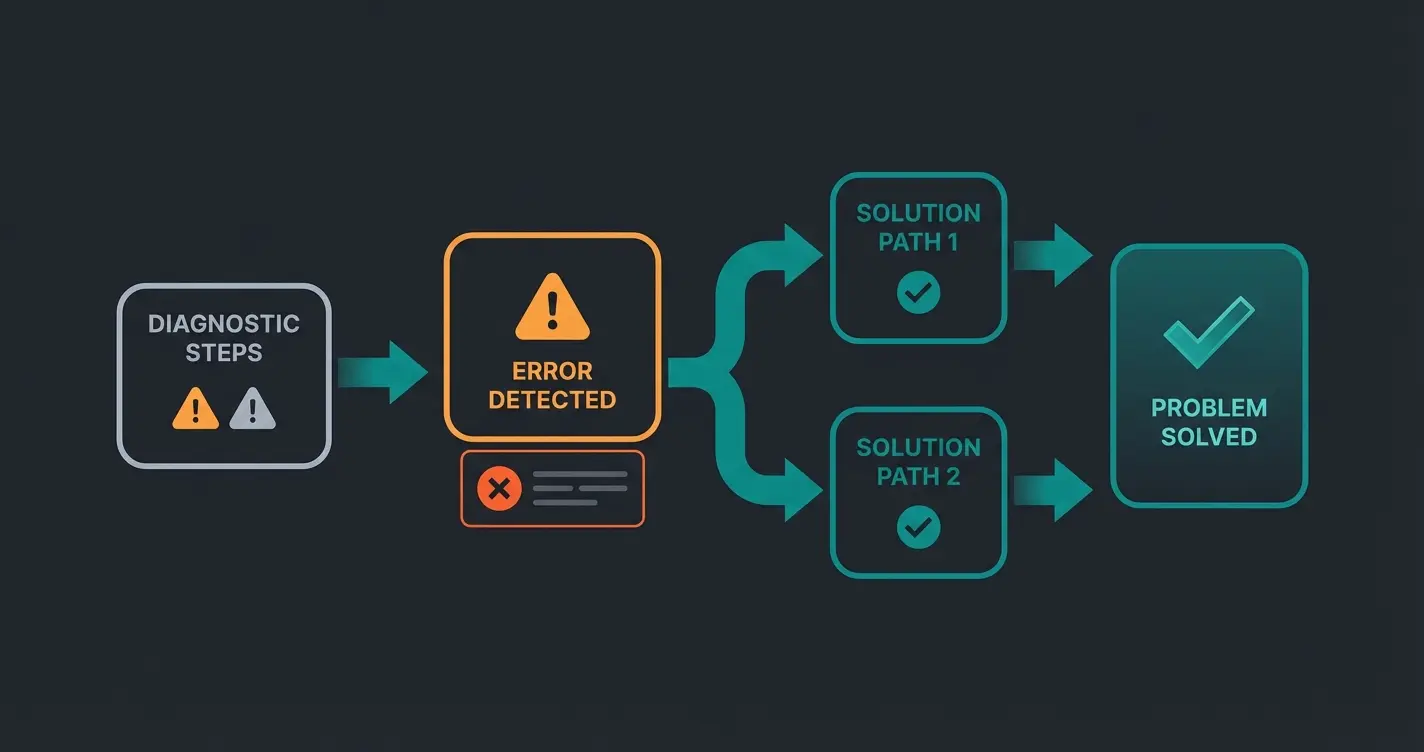
Troubleshooting: Common Errors and Solutions
Even professionals encounter problems. Here's an overview of the most common errors when installing Shopware plugins and how to fix them. If you're experiencing performance issues post-installation, our Shopware update guide covers maintenance best practices.
| Error Message / Symptom | Cause | Solution |
|---|---|---|
| No extension found in ZIP file | Wrong folder structure in ZIP | Unpack, check if composer.json is in root, repack |
| Plugin doesn't appear in list | Cache or missing refresh | CLI: Run bin/console plugin:refresh. Check if folder is in custom/plugins |
| Allowed memory size exhausted | PHP Memory Limit too low | Set memory_limit to 512M or higher in php.ini |
| 500 Internal Server Error after install | Incompatibility or PHP error | Check var/log/prod.log. Often helps to deactivate plugin via database (active = 0 in plugin table) |
| Composer version mismatch | composer.json requirements not met | Check the require section in the plugin. Does it need a newer Shopware version? |
Plugin Performance and Security Considerations
Before installing any plugin, it's critical to vet it properly. No competitor guide covers this, but it's essential for protecting your store and maintaining optimal performance. When adding analytics capabilities, see our guide on Shopware Google Analytics integration.
How to Vet a Plugin Before Installation
- Check for "Verified by Shopware" badge - These plugins undergo rigorous testing
- Read the changelog thoroughly - Look for security patches and breaking changes
- Check last update date - Plugins not updated in 6+ months may have compatibility issues
- Review user ratings and comments - Real-world feedback reveals common problems
- Test in staging environment first - Never install untested plugins in production
Caused by skipping version verification
Result from poorly coded third-party plugins
When following pre-flight checklist
Post-Installation Best Practices
After successfully installing and configuring your plugin, follow these best practices to ensure long-term success. For payment-related plugins specifically, check our Shopware payment plugins comparison.
- Test thoroughly in frontend - Check all affected pages and functions
- Monitor performance metrics - Use browser dev tools and server logs
- Document your configuration - Create notes for team members and future reference
- Set up update notifications - Stay informed about security patches
- Create a rollback plan - Know how to deactivate if issues arise
Integrating Advanced Functionality
Modern Shopware stores benefit from strategic plugin combinations. Consider integrating Shopware SEO plugins for visibility, Shopware marketing plugins for customer engagement, and AI-powered tools for personalized shopping experiences.
The key is ensuring each plugin serves a specific purpose and doesn't conflict with existing functionality. Always test plugin combinations in staging before deploying to production.
Frequently Asked Questions
No, Shopware 5 and Shopware 6 plugins are not compatible. Shopware 6 uses a completely different architecture. You'll need to find a Shopware 6-specific version of the plugin or contact the developer for an update.
First, access your Shopware Admin if possible and deactivate the plugin. If you can't access the Admin, connect to your database and set the plugin's 'active' field to 0 in the plugin table. Then clear the cache via CLI with 'php bin/console cache:clear'. Check var/log/prod.log for specific error messages.
Check the plugin's page in the Shopware Store for the 'Compatible with' information. For plugins from third parties, review the composer.json file's 'require' section. Always test in a staging environment that mirrors your production Shopware version.
For AI tools like product consultants, Apps are generally better because they offload processing to external servers, reducing load on your store. This results in better performance and easier maintenance. Plugins are better for features requiring deep integration with checkout or core Shopware functions.
Check for updates at least monthly and always read changelogs before updating. Security updates should be applied immediately. Always backup before updating and test in staging first. Subscribe to plugin developers' newsletters for critical update notifications.
Conclusion: Installation as the Foundation for Growth
Installing a Shopware plugin is not merely a technical act—it's a strategic decision for your store. Whether you choose the convenient Store method, the flexible upload method, or the professional CLI approach depends on your resources and goals.
What's important is viewing the process holistically:
- Verify prerequisites (PHP 8.2+, backup)
- Install cleanly (Store or CLI)
- Configure thoroughly (API keys, settings)
- Test the result in the frontend
The difference between successful stores and struggling ones often comes down to how well they leverage their technology stack. Proper plugin installation and configuration is the foundation—but the real value comes from choosing the right tools that enhance customer experience and drive conversions.
You now know how to safely implement extensions. It's the perfect time to think about intelligent automation. Our AI Product Consultant integrates seamlessly into your Shopware 6 store using modern app technology for optimal performance.
Try It Free TodayAdditional Resources
Continue learning with these resources to maximize your Shopware store's potential:
- Official Shopware Documentation - Comprehensive technical reference
- FroshTools on GitHub - Essential debugging tools
- Shopware Store - Find certified plugins for your needs